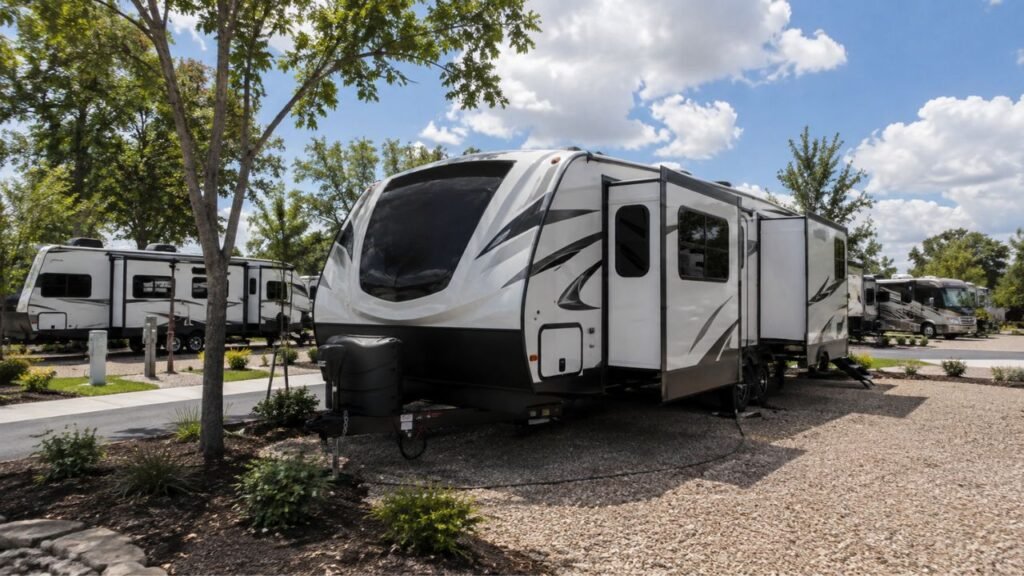
RV roof caulk is a broad term for sealants used around RV joints, seams, and edges. Self-leveling lap sealant is a specific type that slowly spreads after application, making it best for flat, horizontal roof areas. Non-sag RV caulk stays thicker and works better on vertical, curved, or sloped surfaces.
If you are standing beside your RV wondering which tube to use, I’ll make the choice simple. We’ll compare how both products behave, where each belongs, roof compatibility, old sealant, application mistakes, and several situations where neither product is the correct repair.
Key Takeaways
- RV roof caulk is a broad term, not one specific formula.
- Self-leveling lap sealant spreads slightly after you apply it.
- Use self-leveling sealant mainly on flat, horizontal roof surfaces.
- Non-sag sealant works better on vertical, curved, and sloped areas.
- Roof material still determines whether a specific product is compatible.
- Never assume every rooftop component should receive lap sealant.
- Follow your RV and component manufacturer’s sealing requirements first.
RV Roof Caulk vs Self-Leveling Lap Sealant: Quick Comparison
The biggest difference is how each product behaves after application. This table gives you the quick answer before we look deeper.
| Feature | RV Roof Caulk / Non-Sag Sealant | Self-Leveling Lap Sealant |
| General meaning | Usually thicker RV sealant, although “roof caulk” is also a broad term | A flowing type of RV lap sealant |
| Consistency | Thick and paste-like | Softer and more fluid |
| Best surface | Vertical, curved, uneven, or sloped | Flat or nearly horizontal |
| Typical locations | Roof edges, cap seams, side transitions | Roof vents, flanges, screw heads |
| Movement after application | Holds its shape | Slowly spreads outward |
| Tooling | Usually needs some shaping | Usually levels without much tooling |
| Risk when misused | Can remain bulky on flat areas | Can sag on steep surfaces |
| Roof compatibility | Product-specific | Product-specific |
| Interchangeable? | Not always | Not always |
The important thing here is not the word caulk printed on the tube. You need to know whether that particular product is self-leveling or non-sag.
Is RV Roof Caulk the Same as Lap Sealant?
RV owners often use the words caulk, sealant, roof sealant, and lap sealant interchangeably. That can make shopping more confusing than the repair itself.
“RV roof caulk” usually describes a cartridge-applied product used for sealing gaps and joints. It does not automatically mean the product is non-sag.
Lap sealant is commonly used around overlapping roof joints, flanges, penetrations, and fasteners. A lap sealant can be either self-leveling or non-leveling, depending on its formula.
You may even see a manufacturer describe a self-leveling product as “self-leveling caulk.” That is why I recommend checking the product behavior instead of judging it only by the name.
The better question is:
Does this sealant flow after application, or does it stay where I place it?
Once you know that, choosing the correct location becomes much easier.
What Is RV Roof Caulk?
RV roof caulk generally refers to flexible sealing compounds used around roof joints, seams, trim, and other exterior openings.
When someone compares “RV roof caulk” against self-leveling sealant, they are usually thinking about non-sag or non-leveling caulk.
Non-sag sealant has a thick consistency. It stays where you apply it instead of slowly flowing downhill.
That makes it useful around roof edges, vertical joints, front caps, rear caps, sidewall transitions, and curved sections.
You can also shape the bead using a caulk tool. This helps when you need the sealant to follow a specific joint.
Think of it as the more controllable option. You place the bead where needed, and it stays there while curing.
What Is Self-Leveling Lap Sealant?
Self-leveling lap sealant is designed to slowly spread after application. It uses gravity to settle over a flat surface.
That spreading action helps the sealant surround screw heads, cover flange edges, and fill small surface irregularities.
It is especially useful around horizontally mounted roof fixtures.
Common locations include roof vents, plumbing vents, antenna bases, and exposed roof fasteners.
However, self-leveling does not mean the product turns into liquid. It usually keeps enough body to remain over the repair while slowly smoothing outward.
It also does not mean you should spread it across the entire roof. Lap sealant is mainly intended for joints, penetrations, seams, and similar localized areas.
The important limitation is gravity.
Apply self-leveling sealant on a steep surface, and it may migrate before curing. That can leave part of the joint with inadequate coverage.
Where Should You Use Self-Leveling or Non-Sag Sealant on an RV?
The easiest way to choose is by looking at the surface angle. Flat areas normally favor self-leveling sealant, while steep areas need non-sag control.
Roof Vents and Fan Flanges
Most roof vents sit on a horizontal mounting flange.
Self-leveling lap sealant normally works well along the exposed flange perimeter. It can also cover the mounting screw heads.
The sealant spreads slightly across both surfaces, creating broad coverage.
Always confirm that your selected product matches the roof membrane.
Plumbing Vents and Antenna Mounts
Plumbing vent bases and many antenna mounts sit horizontally.
These mounting areas commonly use self-leveling lap sealant around exposed flange edges and fasteners.
Apply enough material to bridge the joint properly. Avoid assuming that thicker automatically means better.
Solar Panel Brackets and Roof Fasteners
Self-leveling lap sealant is commonly used over horizontal mounting fasteners and bracket penetrations.
However, solar mounting systems vary considerably.
Some systems require specific adhesives, tapes, sealants, or mounting procedures. Always check the mounting system instructions before sealing everything with lap sealant.
Roof Edges and Termination Rails
Roof edges can be confusing because they often change direction.
The top section may remain nearly horizontal, while the outer section turns downward toward the sidewall.
Self-leveling sealant may work on the horizontal portion if approved. Once the joint becomes steep or vertical, non-sag sealant usually becomes the safer choice.
Look at where gravity will move the uncured product.
That simple check can prevent a messy repair.
Front and Rear Cap Seams
Front and rear cap joints are often curved or steeply angled.
These locations usually need non-sag sealant because it holds its shape.
Some cap seams continue onto a flatter roof area. In that case, the correct sealant may change along the joint.
You do not have to force one product across every section.
Curved or Sloped Roof Sections
Non-sag sealant is usually safer on noticeably sloped roof sections.
A self-leveling formula can gradually move downhill before it develops enough body.
There is no universal slope angle that works for every sealant. Different formulas behave differently.
When the surface looks questionable, read the product’s application instructions.
RV Windows, Doors, and Sidewall Trim
Do not use self-leveling roof sealant around normal vertical windows and doors.
These areas generally need an RV-approved non-sag exterior sealant.
The thicker bead remains in position and can be neatly tooled.
This also applies around many exterior lights, access doors, and sidewall trim pieces.
What About the RV Air Conditioner?
This is one place where I would not automatically reach for self-leveling sealant.
Many rooftop RV air conditioners seal the roof opening using a compressible foam or rubber gasket underneath the unit.
That gasket creates the primary seal between the air conditioner and roof.
Depending on the installation, sealant may still be needed around roof seams, screw holes, wiring openings, or prepared areas. However, covering the entire A/C base with lap sealant is not automatically correct.
Too much sealant can also make later removal unnecessarily difficult.
If you are servicing an RV air conditioner, check that unit’s installation instructions first. Confirm whether the gasket needs replacement, tightening, or another specified repair.
A leaking A/C opening does not always mean it needs more caulk.
Does RV Roof Material Change Which Sealant You Should Use?
Surface orientation determines whether you need self-leveling or non-sag behavior. Roof material determines whether that specific product can safely bond to your roof.
EPDM Rubber Roofs
EPDM is common on many travel trailers and older RVs.
Use a sealant specifically approved for EPDM roofing.
Avoid assuming that every exterior caulk is safe. Certain cleaners and solvents can also damage rubber roofing.
When cleaning beforehand, use products approved by the roof or sealant manufacturer.
TPO and PVC Roofs
TPO and PVC roofs may look similar to rubber roofing, but their material properties differ.
Many modern RV lap sealants list TPO or PVC compatibility. Others may require special preparation.
Always check the label before applying anything.
Do not assume a product compatible with EPDM automatically works everywhere else.
Fiberglass and Aluminum Roofs
Fiberglass and aluminum are harder surfaces than flexible roof membranes.
Many RV sealants can bond successfully to these materials. However, compatibility still depends on the specific formulation.
Your RV manufacturer may also specify different products around certain seams.
Follow those instructions whenever available.
What If You Do Not Know Your Roof Material?
Do not guess before resealing the roof.
Check your owner’s manual or original RV documentation first.
You may also identify the membrane around an existing roof opening. Sometimes an exposed membrane edge reveals its construction.
Your RV manufacturer or dealer may also identify the roof material using model information.
Taking a few minutes here can prevent a much larger repair later.
Can You Use Regular RV Caulk Instead of Self-Leveling Lap Sealant?
Sometimes a compatible non-sag sealant can physically seal a horizontal joint. However, that does not mean it performs exactly like self-leveling lap sealant.
Non-sag material stays thick and keeps its bead shape.
Around a horizontal vent flange, this can create a bulky ridge requiring more tooling.
Self-leveling sealant spreads across the flange edge and surrounding roof surface. That behavior makes it especially useful around irregular screws and horizontal joints.
The opposite substitution creates a bigger problem.
Using self-leveling sealant on a steep or vertical seam may allow the product to sag away from the joint.
If the repair specifically calls for self-leveling lap sealant, use that product unless your RV manufacturer approves another option.
What Happens If You Use the Wrong Type?
The wrong sealant may still look acceptable immediately after application. Problems often become clearer after gravity, vibration, temperature changes, and weather start working on the repair.
Common problems include:
- Self-leveling sealant running away from a steep joint.
- Thin coverage forming along the upper edge.
- Excess sealant collecting below the intended repair.
- Non-sag sealant creating bulky ridges on horizontal surfaces.
- Poorly shaped beads leaving small voids along joint edges.
- Incompatible sealant failing to bond properly.
- New sealant lifting because the old surface was contaminated.
- Thick applications curing unevenly underneath.
- Water entering after the seal separates from one surface.
This is why choosing the product before climbing onto the roof matters.
You want the sealant working with gravity instead of fighting it.
Can You Apply New Lap Sealant Over Old RV Roof Caulk?
Sometimes you can apply new material over existing sealant. The condition and compatibility of the old bead determine whether that is sensible.
When You Can Seal Over Existing Sealant
Existing sealant may remain in place when it is firmly bonded.
It should not be loose, badly cracked, contaminated, or separating from the roof.
Clean the area using the method recommended for your membrane.
Then apply the new compatible sealant so it overlaps solid material.
The new bead should also reach a properly prepared bonding surface.
When Old Sealant Should Be Removed
Remove loose or badly deteriorated material before resealing.
Watch for lifted edges, deep cracks, missing sections, trapped dirt, and sections pulling away from the roof.
Do not simply bury a failed bead beneath more product.
The new layer depends on whatever sits underneath it.
If that old material releases, your new repair can release with it.
Be Careful Around Silicone and Unknown Sealants
Unknown old sealant deserves extra caution.
Some sealants do not bond reliably over cured silicone or other incompatible materials.
However, modern RV sealing systems vary, so I would avoid using one universal rule.
Identify the old product when possible.
Then check whether your new sealant requires removal, cleaning, primer, or another preparation method.
Before Applying Either Type of RV Roof Sealant
Good preparation often matters more than using an oversized bead. Before opening the tube, make sure the surface and product actually match.
- Identify the roof material: Determine whether you have EPDM, TPO, PVC, fiberglass, aluminum, or another roof system.
- Check product compatibility: Make sure your chosen sealant lists the roof material as approved.
- Inspect the old sealant: Remove loose, peeling, or badly deteriorated sections where required.
- Clean the repair area: Use a cleaner approved for both the membrane and sealant system.
- Let everything dry completely: Trapped moisture can interfere with adhesion.
- Check the weather: Apply within the temperature and weather conditions listed by the manufacturer.
- Apply a controlled bead: Cover the joint adequately without creating unnecessary piles.
- Let the product cure properly: Skin time, rain-ready time, and full cure are different things.
Do not assume every lap sealant needs exactly 24 or 48 hours.
Different formulations cure at different speeds.
Always check the tube before exposing fresh sealant to rain or travel.
When Neither Roof Caulk Nor Self-Leveling Lap Sealant Is the Right Repair
Some RV roof problems need another sealing method entirely. Recognizing those situations can save you from repeatedly caulking the same leak.
You may need something else when:
- A new flange requires butyl tape underneath as the primary seal.
- An RV air conditioner relies on a compression gasket.
- A long damaged seam is better suited for compatible repair tape.
- The roof membrane has a large tear or puncture.
- Multiple roof areas are chalking or deteriorating.
- The entire roof requires a coating or restoration system.
- Moisture has damaged the roof decking underneath.
- A loose component needs mechanical repair before sealing.
- Structural movement keeps reopening the same joint.
Sealant stops water at a sound joint.
It cannot repair rotten wood, broken mounting hardware, or structural movement.
If the same seam keeps failing, investigate what is moving underneath.
How to Choose Between RV Roof Caulk and Self-Leveling Lap Sealant
You do not need to make this complicated. Start with the surface, then check compatibility and manufacturer requirements.
Use this quick decision guide:
- Flat roof vent flange: self-leveling lap sealant.
- Horizontal screw heads: self-leveling lap sealant.
- Horizontal antenna base: usually self-leveling lap sealant.
- Vertical exterior joint: non-sag RV sealant.
- Curved front cap seam: usually non-sag sealant.
- Roof-to-sidewall transition: choose according to joint orientation.
- Significantly sloped surface: usually non-sag sealant.
- Unknown roof membrane: identify it before buying sealant.
- Unknown old caulk: confirm compatibility before covering it.
- Component using a gasket: follow its installation instructions first.
If you remember one rule, remember this:
Flat surfaces favor self-leveling. Steep surfaces favor non-sag. Compatibility decides whether that particular tube belongs on your RV.
Common RV Roof Sealant Mistakes
A good product can still fail when used incorrectly. These are the mistakes I would avoid during any RV roof repair.
- Treating every product labeled “RV caulk” as interchangeable.
- Using self-leveling sealant on vertical surfaces.
- Using non-sag sealant everywhere simply because it stays put.
- Ignoring the roof membrane type.
- Applying sealant over dirt or moisture.
- Covering loose old caulk instead of removing it.
- Assuming every rooftop fixture needs sealant around its entire base.
- Using household caulk without verifying RV compatibility.
- Applying more sealant instead of diagnosing a recurring leak.
- Assuming dry-to-touch means fully cured.
- Mixing products without checking compatibility.
- Sealing over damaged roof decking.
- Using a thick bead to compensate for poor preparation.
Most roof-sealing problems are easier to prevent than repair twice.
A careful inspection before application usually pays off.
Final Words
RV roof caulk and self-leveling lap sealant are not always completely separate product categories. “RV roof caulk” is often a broad term, while self-leveling describes how a particular lap sealant behaves after application.
For flat roof surfaces, self-leveling lap sealant usually gives you better coverage around flanges, seams, and screw heads. For vertical, sloped, and curved areas, a non-sag RV sealant stays where you need it.
I would also check two things before every repair: roof compatibility and manufacturer instructions. Those matter more than brand familiarity or what another RV owner happened to use.
Choose the correct product, prepare the surface properly, and inspect your seals regularly. That is much easier than tracking down hidden water damage later.
Related FAQs
Is RV Roof Caulk the Same as Self-Leveling Sealant?
Not necessarily. RV roof caulk is a broad term that can describe several exterior sealants. Self-leveling lap sealant is a specific formula designed to spread across horizontal surfaces after application.
Is Lap Sealant the Same as Caulk?
The terms often overlap in RV use, but they are not always identical. Lap sealant usually describes a flexible sealant used around roof seams, flanges, penetrations, and overlapping joints.
Can I Use Non-Sag Lap Sealant on a Flat RV Roof?
You sometimes can if the product is approved for that surface, but it will not level itself. Self-leveling lap sealant is usually easier around horizontal flanges and screw heads.
Can I Use Self-Leveling Lap Sealant on a Sloped RV Roof?
It depends on the slope and the sealant instructions. Self-leveling formulas can migrate downhill on steep surfaces, so non-sag sealant is generally safer for noticeable slopes.
Can I Use Self-Leveling Sealant Around an RV Roof Vent?
Yes, self-leveling lap sealant is commonly used around horizontal vent flanges and exposed fasteners. Always confirm that the specific product is compatible with your roof membrane.
Should I Put Self-Leveling Sealant Around My RV Air Conditioner?
Not automatically. Many rooftop air conditioners use a compression gasket as their primary roof seal. Follow the A/C manufacturer’s installation instructions before adding sealant around the unit.
Is Self-Leveling Lap Sealant Safe for EPDM and TPO Roofs?
Many RV self-leveling sealants are made for EPDM and TPO roofs, but compatibility varies. Check the specific product label before applying it to your membrane.
Do I Need to Remove Old RV Roof Caulk Before Resealing?
Not always. Firmly adhered and compatible sealant may sometimes remain after proper cleaning. Remove sections that are loose, badly cracked, contaminated, or pulling away from the roof.
How Long Does Self-Leveling RV Sealant Take to Dry?
Drying and curing times vary by product, temperature, and humidity. Check the manufacturer’s instructions for skin time, rain exposure, travel time, and full cure.
How Often Should RV Roof Caulk Be Checked?
Inspect roof sealant several times each year and after severe weather or roof contact. Repair cracks, lifting edges, gaps, and separation as soon as you find them.

Gregory Allen covers outdoor RV camping, essential gear, and travel preparation. His reviews are based on real conditions, not spec sheets alone. He helps RVers choose equipment that works reliably in everyday outdoor use.