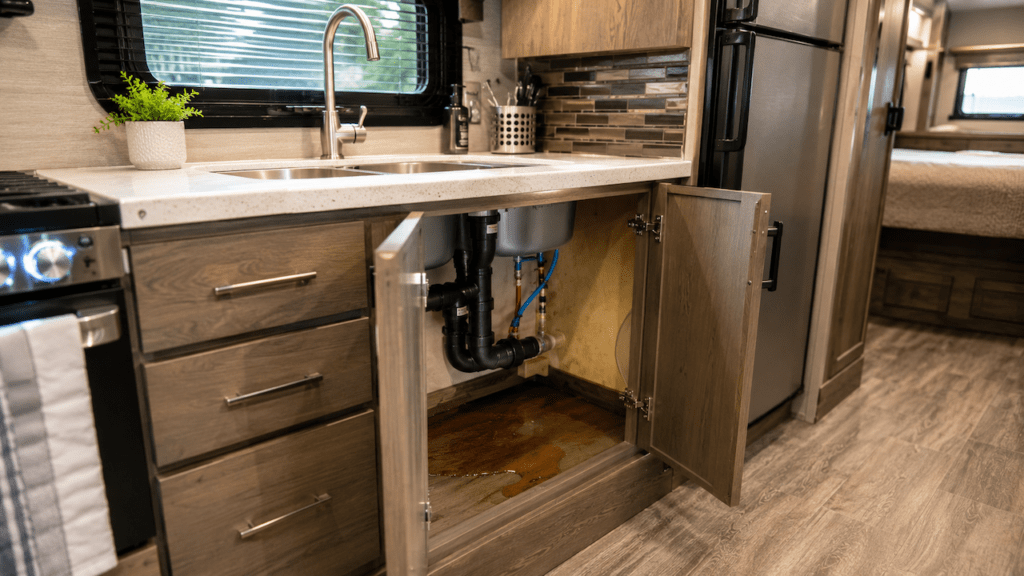
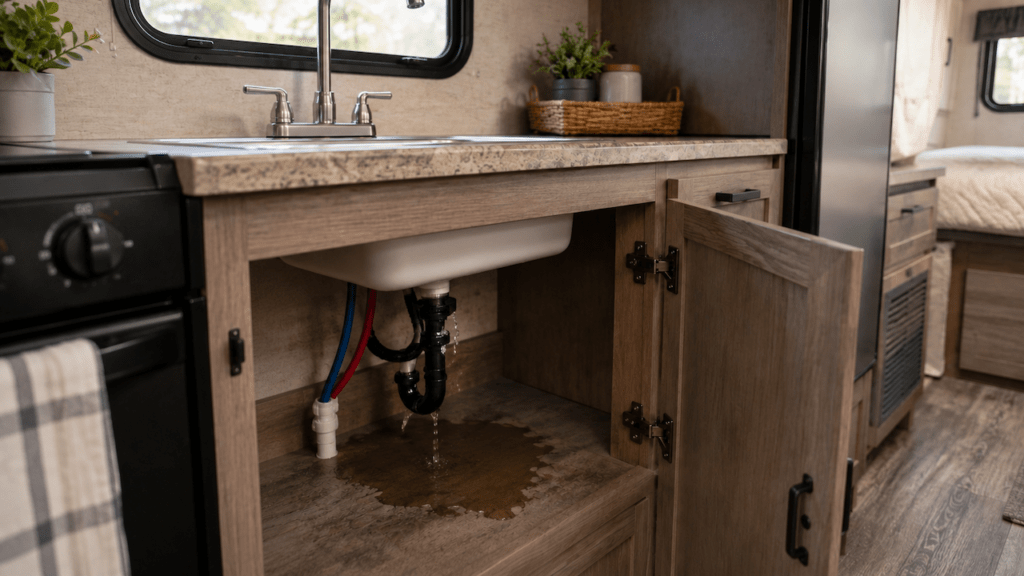
Water under your RV kitchen sink usually comes from a loose supply fitting, leaking P-trap, failed drain seal, cracked plumbing fitting, or faucet hose leak. RV travel vibration can loosen connections over time. High campground water pressure or freeze damage can also expose weak plumbing parts.
The good news is that most sink leaks are fairly easy to isolate. I’ll help you determine where the water starts, what the leak pattern means, and which repairs you can safely handle yourself.
Key Takeaways
- Water appearing without draining usually points to the supply side.
- Water appearing only while draining usually indicates drain plumbing.
- RV vibration can loosen plastic nuts and plumbing connections.
- P-trap joints depend on correctly positioned washers for sealing.
- Overtightening plastic fittings can create cracks and worsen leaks.
- Faucet and sprayer leaks can drip far below their actual source.
- Dry the cabinet quickly to prevent swelling and floor damage.
- Repeated leaks may indicate poor pipe support or excessive pressure.
First, Determine When the RV Kitchen Sink Leaks
When the leak appears can tell you almost as much as the location. Before removing anything, watch the plumbing during several simple tests. This helps separate a pressurized water leak from a drain leak.
| When Water Appears | Most Likely Cause | What to Check First |
| Faucet is off, but plumbing is pressurized | Supply line or fitting | Hot and cold water connections |
| Only while the faucet runs | Faucet, sprayer hose, supply connection | Underside of faucet |
| Only while water drains | P-trap or drain connection | Slip nuts and washers |
| Sink is full but not draining | Basket strainer or drain seal | Area beneath drain opening |
| Full sink drains quickly | Loose or misaligned drain plumbing | P-trap and tailpiece |
| Only when connected to city water | Pressure-related supply leak | Regulator and supply fittings |
| Only when using hot water | Hot-side connection | Hot supply hose and fitting |
| Leak appears after traveling | Shifted or loosened plumbing | Drain alignment and fittings |
| Leak appears after winter storage | Freeze-damaged fitting or pipe | Plastic connections and water lines |
This testing order prevents unnecessary repairs. You do not want to dismantle the P-trap when the faucet hose is actually leaking above it.
What Causes Water to Leak Under an RV Kitchen Sink?
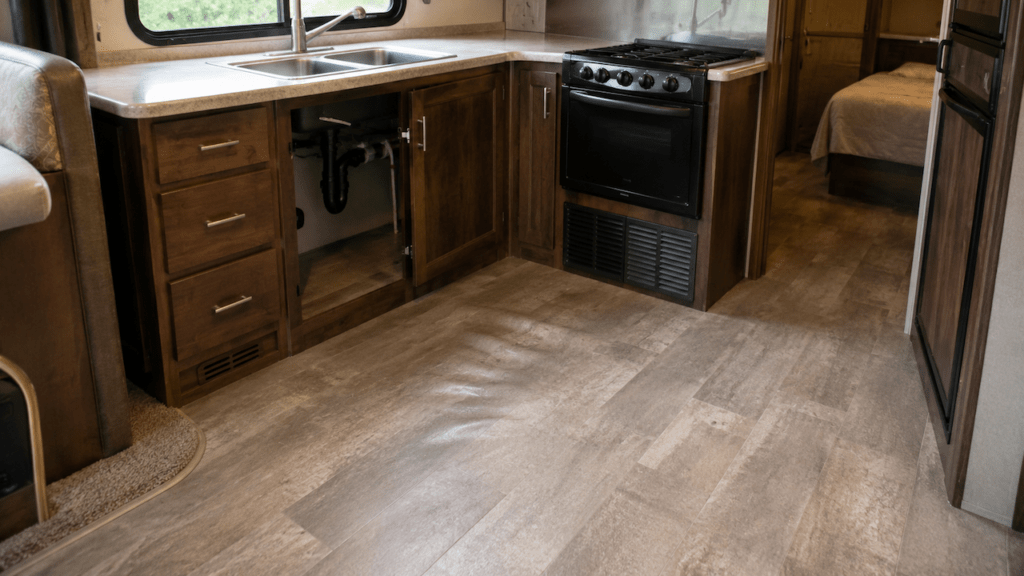
Several parts sit close together beneath an RV kitchen sink. That makes the leak source easy to misidentify. Start at the highest wet connection and work downward.
Loose Hot or Cold Water Supply Connection
The hot and cold supply lines connect directly beneath your faucet.
These connections remain pressurized whenever your water system is active. A slightly loose connection may produce a slow drip continuously.
Travel vibration can gradually loosen some fittings. Plastic swivel nuts and washers can also wear over time.
Feel around both faucet connections with a dry paper towel. Even a small amount of moisture should show immediately.
If the fitting is only loose, gentle tightening may solve it. Do not immediately grab large pliers.
Many RV plumbing fittings contain plastic components. Excessive force can crack them.
Loose or Misaligned P-Trap
The P-trap is the curved drain section beneath your sink.
Unlike your water supply lines, it normally leaks only during draining. You may notice nothing while the faucet simply fills the basin.
RV drain plumbing can move during travel. A heavy drain pipe may also pull downward on the trap.
That movement can cause:
- A slip joint to separate slightly.
- A washer to move out of position.
- The tailpiece to pull away from the trap.
- A plastic nut to loosen.
- The entire trap to sit under sideways pressure.
If your sink leaks after a rough trip, inspect this area closely.
Damaged or Misaligned P-Trap Washer
A P-trap slip joint usually seals with a tapered washer.
The threads themselves are not what stop the water. Tightening the nut compresses the washer against the pipe.
Leaks can happen when the washer becomes:
- Pinched.
- Reversed.
- Cracked.
- Hardened.
- Dirty.
- Missing.
- Poorly centered.
This is why simply tightening the nut harder may not help.
Sometimes removing the joint and properly reseating the washer fixes everything.
Leaking Sink Basket Strainer or Drain Seal
The leak may actually begin where the drain passes through your sink.
This area contains the basket strainer or drain flange. A seal prevents water from slipping around the outside of the drain.
You can test this easily.
Close the drain and fill the sink with several inches of water. Do not drain it yet.
Now inspect underneath the drain opening.
If moisture appears while the sink remains plugged, the drain flange or strainer seal deserves attention.
This problem can result from:
- An aging seal.
- A loose strainer assembly.
- Movement around the drain.
- Improper installation.
- Failed sealing material.
Do not automatically smear sealant underneath the leaking area. The correct repair often requires removing and properly resealing the drain assembly.
Cracked Plastic Fitting or Water Line
RV plumbing contains several plastic fittings and water-line connections.
A tiny crack can be surprisingly difficult to see. The fitting may appear normal until the system becomes pressurized.
Look carefully around:
- Elbows.
- Tees.
- Faucet adapters.
- PEX connections.
- Plastic threaded fittings.
- Flexible supply hoses.
- Clamps and crimps.
Dry everything completely before testing.
A dry paper towel often reveals a hairline leak faster than your eyes.
If a plastic fitting is cracked, tightening it usually will not help. More force can make the crack larger.
Replacement is usually the proper repair.
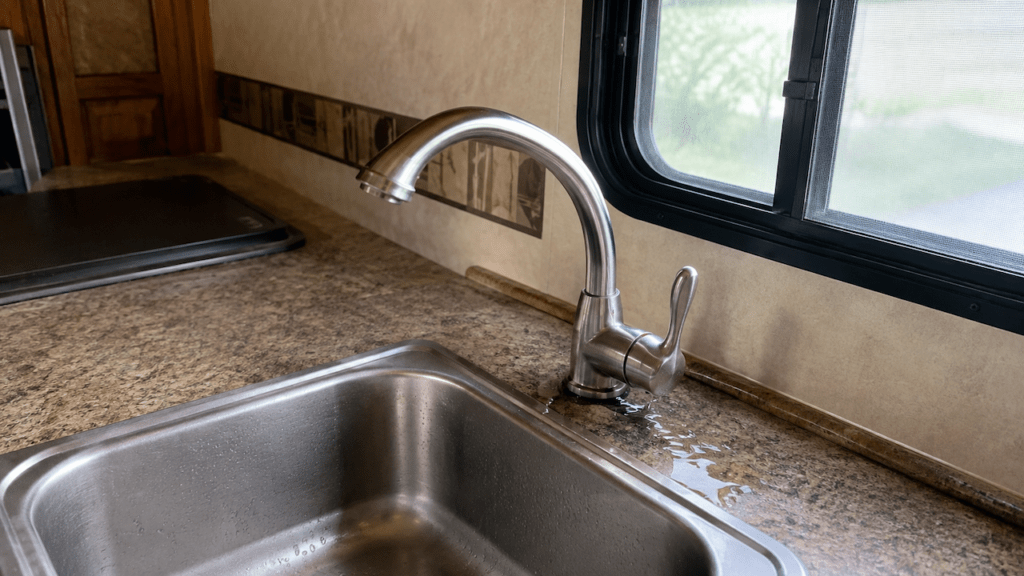
Faucet or Pull-Down Sprayer Hose Leak
This problem fools a lot of RV owners.
Water may drip from a supply hose near the cabinet floor. However, the actual leak can be several inches higher.
Pull-down kitchen faucets contain moving hose connections. Water can travel along that hose before dripping elsewhere.
Check:
- Faucet body connections.
- Pull-down sprayer hose.
- Hose couplings.
- Swivel fittings.
- Faucet mounting area.
Run the faucet while watching from underneath.
Then move the sprayer through its normal range.
If the drip changes as the hose moves, investigate the faucet assembly first.
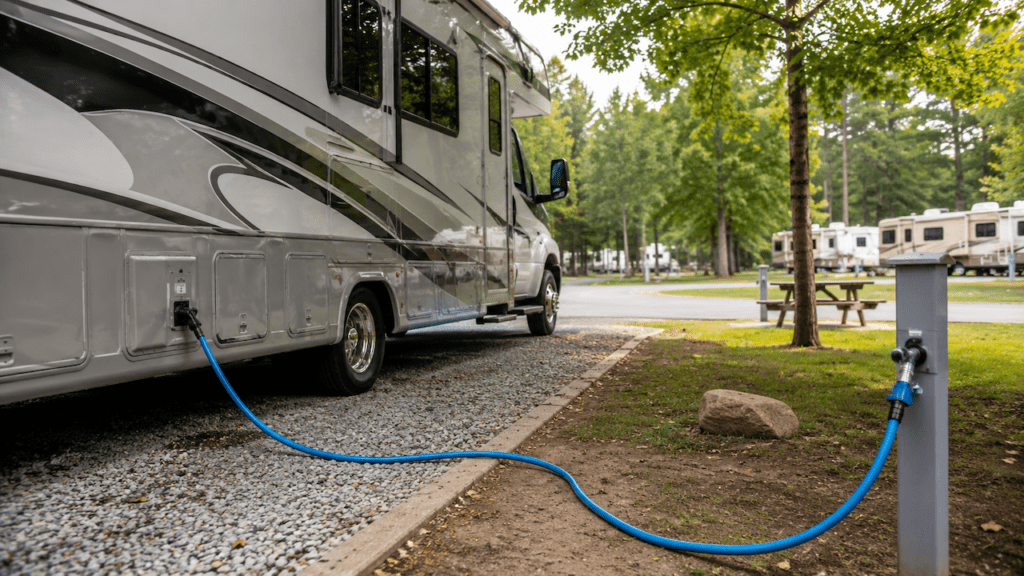
Excessive Campground Water Pressure
Campground water pressure varies considerably.
Your RV plumbing system may experience more pressure than expected. A weak connection can begin leaking once higher pressure reaches it.
That does not always mean pressure created the original problem. Sometimes it simply reveals a fitting already near failure.
Use an RV water pressure regulator when connecting to campground water.
If your RV has an adjustable regulator, follow your manufacturer’s recommended pressure. Do not assume every RV should use the same setting.
If the leak disappears on the water pump but returns on city water, pressure deserves closer attention.
RV Travel Vibration and Plumbing Movement
An RV plumbing system experiences movement a house never sees.
Every trip introduces vibration, flexing, bumps, and twisting. Lightweight drain components can gradually shift.
Travel itself usually is not the entire problem.
More often, vibration reveals another weakness such as:
- Poorly supported drain plumbing.
- A fitting installed under tension.
- A loose slip joint.
- Excessive pipe weight.
- A poorly seated washer.
- A supply line rubbing against cabinetry.
If the same connection keeps loosening, investigate the movement causing it.
Repeated tightening is not a permanent repair.
How Do I Find Exactly Where the Water Is Coming From?
Finding the source is easier when you test one plumbing section at a time. Randomly tightening everything can hide the real problem or damage plastic parts.
Turn Off the Water and Dry Everything First
Start with a clean, dry cabinet.
Turn off your water pump. Disconnect or shut off campground water.
Remove anything stored under the sink.
Then dry:
- Cabinet flooring.
- P-trap.
- Drain pipes.
- Faucet connections.
- Supply hoses.
- Faucet underside.
- Sink drain assembly.
You want every surface completely dry.
Any fresh moisture will then become much easier to identify.
Start at the Highest Plumbing Connection
Water follows gravity.
The lowest wet fitting is not always the leaking fitting.
Begin underneath the faucet and inspect downward.
Touch dry paper towels against individual connections. Paper quickly reveals even tiny amounts of moisture.
You can also loosely wrap a small piece around suspicious joints.
Watch which one becomes wet first.
That first wet point matters more than the final drip location.
Pressurize the System Without Running the Faucet
Turn on your water pump without opening the faucet.
Alternatively, connect city water through your regulator.
Now watch the plumbing.
If water appears while nothing enters the sink drain, the leak likely involves the pressurized side.
Check:
- Hot supply line.
- Cold supply line.
- Faucet connections.
- PEX fittings.
- Flexible hoses.
A drain leak normally will not appear during this test.
Test the Cold and Hot Water Separately
Run only cold water first.
Watch underneath the sink for several seconds.
Stop the water and dry everything again.
Then repeat with hot water.
If the leak appears only during one test, you have narrowed the problem considerably.
The corresponding faucet connection or supply line becomes your main suspect.
Fill the Sink Without Draining It
Plug the sink.
Add several inches of water.
Then leave it sitting.
Inspect the drain flange and basket area underneath.
If water appears now, the P-trap may not be responsible.
Water should not yet be moving through the trap.
A leak during this test usually points closer to the drain opening or sink assembly.
Drain a Full Sink
Now remove the stopper.
Let the entire basin drain quickly.
This sends a larger volume of water through the drain system. Small drain leaks often become obvious during this test.
Watch:
- Tailpiece connection.
- P-trap inlet.
- P-trap outlet.
- Slip joints.
- Downstream drain connection.
If a joint leaks only during this stage, inspect its alignment and washer.
Compare the Water Pump With City Water
You can learn a lot by testing both water sources.
First, test using only your onboard pump.
Then test with campground water through your regulator.
If the leak appears only on city water, incoming pressure may be exposing a weak fitting.
Also listen to your water pump.
If it periodically runs while every faucet remains closed, pressure may be escaping somewhere.
That can indicate a supply-side leak.
A leaking P-trap would not normally cause the pump to cycle.
How Do You Fix a Leaking RV Kitchen Sink?
The correct repair depends entirely on which connection is leaking. Once you know the source, avoid unnecessary disassembly and repair only the affected area.
Fixing a Loose Faucet Supply Connection
Shut off the water before touching the fitting.
Then open the faucet briefly to release pressure.
Inspect the leaking connection.
If the fitting uses a washer or gasket, make sure it sits correctly.
Start by tightening the connection gently by hand.
Turn the water back on and test.
If the connection still leaks, do not keep tightening indefinitely.
Remove the fitting and inspect:
- Washer condition.
- Threads.
- Cracks.
- Hose end.
- Mating surface.
Replace damaged components instead of forcing them tighter.
Also remember that not every threaded connection needs thread tape.
Some threaded-looking fittings actually seal through an internal washer.
Fixing a Leaking P-Trap
Place a shallow container or towel underneath first.
Water will remain inside the trap.
Then:
- Loosen the slip nuts.
- Remove the leaking trap section.
- Inspect the washers.
- Clean the pipe surfaces.
- Replace damaged washers.
- Realign the pipes naturally.
- Reassemble the slip joints.
- Tighten the nuts by hand.
- Run water and inspect again.
The pipes should fit together without forcing them sideways.
If you must push the drain strongly into position, alignment may be the real issue.
Do not use excessive force on plastic trap fittings.
A cracked nut creates a second leak.
Fixing the Sink Basket or Strainer Seal
If your drain leaks while the sink remains full, inspect the drain seal.
The drain assembly may need removal and resealing.
The general repair involves:
- Removing the drain assembly.
- Cleaning away the old sealing material.
- Inspecting the drain and sink surfaces.
- Applying an approved sealing material.
- Reinstalling the drain correctly.
- Testing with standing water.
Use sealing material compatible with your sink and drain components.
Traditional plumber’s putty is not suitable for every material.
Some acrylic, plastic, composite, and specialty sinks require another approved sealant.
When uncertain, follow the sink or drain manufacturer’s directions.
Replacing a Cracked Supply Fitting or PEX Connection
A cracked water fitting should usually be replaced.
Do not try to repair a pressurized fitting with exterior sealant.
First shut off the water and release system pressure.
Then identify the tubing and fitting type.
RV plumbing may use:
- PEX.
- Flexible braided hose.
- Reinforced water tubing.
- Threaded plastic adapters.
- Crimp fittings.
- Clamp fittings.
- Push-style fittings.
Match the replacement part to your existing plumbing.
PEX repairs also require the correct connection method.
If using crimp or clamp fittings, use the proper tool.
After replacing the fitting, pressurize the system and watch it carefully.
Do not immediately close the cabinet and assume everything is fixed.
Repairing a Faucet or Sprayer Hose Leak
A leaking sprayer hose may require only a small component.
Possible repairs include replacing:
- A hose washer.
- O-ring.
- Sprayer hose.
- Quick-connect fitting.
- Faucet supply hose.
Some RV faucets use inexpensive plastic internal components.
If several sections are leaking, replacing the entire faucet may make more sense.
After repair, move the sprayer through its full range.
Confirm that pulling and retracting the hose does not restart the leak.
Correcting a Shifted Drain Line
A shifted drain pipe should not be forced into position permanently.
First loosen the necessary slip joints.
Allow the drain sections to return to natural alignment.
Then reconnect them without excessive sideways pressure.
If a long drain section hangs heavily from the sink, additional support may help.
The goal is simple.
The P-trap should not carry the weight of an unsupported drain line.
That extra weight can pull connections apart during travel.
Should You Glue an RV Kitchen Sink P-Trap?
Most removable RV sink P-traps with slip-joint nuts should not be glued at those slip connections.
These joints are designed to seal using washers and compression. They also need to remain removable for cleaning and repairs.
If the slip joint leaks, inspect the washer and alignment first.
Glue will not fix a poorly seated compression washer.
Your RV may also contain permanently joined drain plumbing farther downstream. Those connections use different materials and installation methods.
Do not assume every drain connection is assembled the same way.
Should You Use Teflon Tape on an RV Sink Leak?
Teflon tape is useful only on connections designed to seal through tapered pipe threads.
It does not belong on every threaded-looking fitting.
A typical P-trap slip joint seals with a compression washer. Adding thread tape to the slip nut usually does not correct the actual problem.
Likewise, many faucet supply connections use an internal rubber washer.
If that washer is damaged, thread tape will not replace it.
Identify how the specific fitting seals before adding anything to the threads.
Why Does My RV Sink Leak Only After Traveling?
A leak appearing after travel usually points toward movement.
Your RV flexes and vibrates while driving. Drain pipes, faucet hoses, and plumbing fittings move slightly as well.
A previously marginal connection may loosen after several trips.
Inspect the P-trap first if water appears during draining.
Also look for pipes pulling sideways against their fittings.
On the pressurized side, check faucet supply connections and nearby PEX fittings.
If the same connection repeatedly loosens, adding support may matter more than tightening it again.
The plumbing should not constantly pull against the fitting.
Why Does My RV Kitchen Sink Leak Only on City Water?
City-water pressure can expose a weak fitting that seems fine on your pump.
Your onboard water pump controls pressure within its normal operating range.
Campground water supplies vary.
If incoming pressure is too high, a marginal fitting may begin dripping.
Test the same plumbing using your onboard tank and pump.
If the leak disappears, inspect your city-water pressure regulator.
Also check every nearby supply fitting.
A regulator can protect your RV plumbing, but it cannot repair a damaged connection.
Follow your RV manufacturer’s pressure recommendations whenever possible.
What Should I Do With the Wet Cabinet After Fixing the Leak?
Stopping the leak is only half the job. Water sitting inside lightweight RV cabinetry can cause swelling, odors, staining, and eventually floor damage.
- Remove everything stored beneath the sink.
- Wipe away all standing water immediately.
- Leave cabinet doors open for better airflow.
- Use moving air to speed drying when practical.
- Inspect the cabinet base for swelling.
- Look for darkened or discolored wood.
- Press gently for any unusually soft areas.
- Check the surrounding flooring.
- Watch for lingering musty smells.
- Retest the plumbing after the area dries.
- Recheck the repair again after your next trip.
A small plumbing leak can cause larger damage when unnoticed for weeks.
That is why early drying matters.
When Should I Stop the DIY Repair and Call an RV Technician?
Many sink leaks are simple enough for careful DIY repair. However, some situations deserve professional inspection instead of repeated experimentation.
Call an RV technician when:
- A correctly reseated fitting still leaks.
- Water comes from inside a wall.
- Plumbing disappears beneath the floor.
- Several fittings failed after freezing weather.
- A PEX repair requires tools you do not have.
- You find extensive water-damaged cabinetry.
- The subfloor feels soft.
- Water appears far from the kitchen plumbing.
- The same fitting repeatedly fails.
- Plumbing seems poorly supported behind cabinetry.
- Your RV remains under applicable warranty coverage.
- You are unsure which fitting type you are dealing with.
There is no benefit in turning one accessible drip into a larger plumbing repair.
If the source is hidden, getting help early may save money.
How Can I Prevent Another Leak Under the RV Kitchen Sink?
A few simple habits can reduce the chances of another wet cabinet. RV plumbing benefits from occasional inspection because travel continually exposes it to vibration and movement.
- Inspect visible plumbing connections several times each season.
- Check beneath the sink after rough travel days.
- Use an RV water pressure regulator at campgrounds.
- Follow your RV manufacturer’s recommended water pressure.
- Do not store heavy objects against plumbing.
- Keep sprayer hoses free from sharp cabinet edges.
- Inspect your plumbing after dewinterizing.
- Correct unsupported drain pipes.
- Turn the water pump off when leaving the RV.
- Shut campground water off during extended absences.
- Consider placing a small leak detector beneath the sink.
- Check repaired joints again after your next trip.
You do not need to constantly tighten every connection.
Instead, look for new moisture and movement.
Repeated tightening can eventually damage plastic plumbing parts.
Final Words
Water under an RV kitchen sink can look complicated because several plumbing connections sit within a small space. Fortunately, the timing of the leak usually gives you an excellent starting point.
If water appears while the plumbing is simply pressurized, inspect the supply side. If it appears only during draining, concentrate on the P-trap and drain assembly. And, if the sink leaks while holding standing water, investigate the basket strainer seal.
Always start at the highest wet point.
Then identify how that specific fitting seals before tightening anything.
Once the repair is complete, dry the cabinet thoroughly and retest everything. A careful ten-minute inspection can prevent months of hidden moisture damage.
Related FAQs
Why Is My RV Kitchen Sink Leaking Only When It Drains?
A leak appearing only during draining usually comes from the P-trap, tailpiece, slip-joint washer, or another drain connection. Fill the sink, release the stopper, and watch each drain joint while the larger volume of water passes through.
Why Is My RV Kitchen Sink Leaking When the Faucet Is Off?
If water appears while the faucet remains off, your pressurized plumbing may be leaking. Inspect hot and cold supply connections, PEX fittings, faucet hoses, and nearby adapters while the water pump or city-water connection remains active.
Can High Water Pressure Cause an RV Sink Leak?
Yes. Excessive campground water pressure can stress RV plumbing and expose weak fittings. Use a suitable water pressure regulator and follow your RV manufacturer’s recommended pressure rather than relying on an unrestricted campground connection.
Can RV Travel Loosen Kitchen Sink Plumbing?
Yes. Road vibration and movement can gradually loosen drain fittings or expose poorly supported plumbing. Check the P-trap, supply connections, and drain alignment if a leak suddenly appears after a trip.
Should I Use Teflon Tape on RV Sink Fittings?
Only use thread tape where the connection is designed to seal through pipe threads. P-trap slip joints and many faucet supply connections rely on washers instead, so adding tape will not fix a damaged or misaligned seal.
Do RV P-Traps Need Plumber’s Putty?
No. The removable slip joints on a typical P-trap usually seal with compression washers. Plumber’s putty may be used with some drain strainers, but compatibility depends on the sink and drain materials.
Why Does My RV Kitchen Sink Leak After Winterization?
A leak after winter storage may indicate freeze damage, a disturbed fitting, or a connection that was opened during winterization. Inspect plastic adapters, PEX fittings, faucet connections, and drain components carefully while repressurizing the system.
Can a Small RV Sink Leak Damage the Floor?
Yes. Even a slow drip can soak cabinetry and eventually reach the subfloor. RV materials are often lightweight and can swell or soften after prolonged moisture exposure, so repair and dry the area as soon as possible.

Gregory Allen covers outdoor RV camping, essential gear, and travel preparation. His reviews are based on real conditions, not spec sheets alone. He helps RVers choose equipment that works reliably in everyday outdoor use.