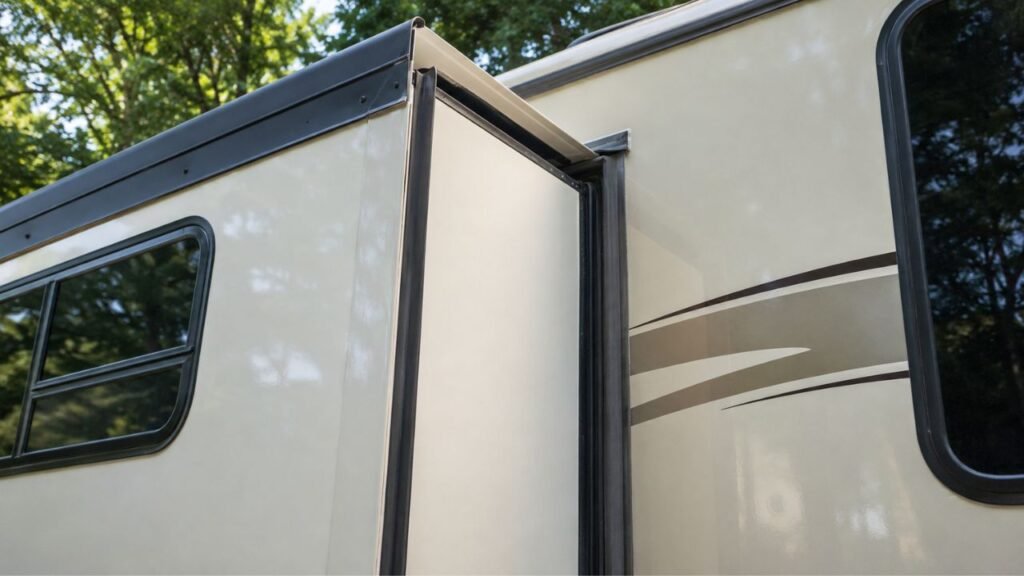
To inspect RV slide-out seals for water leaks, check the seals with the slide both fully extended and fully retracted. Look for tears, cracks, folded wiper seals, gaps, loose mounting areas, poor bulb-seal compression, damaged roof seams, and moisture around the interior slide opening.
I’ll walk you through the inspection in a practical order. You’ll also learn how to tell whether the rubber seal is actually leaking or water is entering from another part of the slide-out.
Key Takeaways
- Inspect slide-out seals with the room extended and retracted.
- Check wiper seals for tears, folding, gaps, and poor contact.
- Check bulb seals for consistent compression when the slide closes.
- Inspect the slide roof, corners, molding, screws, and sealant too.
- Pay extra attention to the upper and lower slide corners.
- Look inside for stains, damp flooring, swelling, and musty odors.
- Use a controlled garden-hose test when the leak remains unclear.
- Do not assume replacing the rubber seal will fix alignment problems.
What Parts of an RV Slide-Out Can Let Water In?
A slide-out uses several sealing surfaces to keep rain outside. Knowing what each part does makes your inspection much easier.
| Slide-Out Area | What It Does | What You Should See | Possible Leak Warning |
| Wiper or sweep seal | Wipes water and debris as the slide moves | Flexible flap touching the slide wall | Folded rubber, tear, gap, poor contact |
| Bulb seal | Compresses when the slide reaches its stop | Even contact around the opening | Flat area, gap, weak compression |
| Top seal | Protects the most exposed slide edge | Continuous contact across the top | Curling, debris, tears |
| Slide roof | Directs rain toward the exterior | Clean, intact surface | Tear, puncture, lifted membrane |
| T-molding or flange | Seals and finishes slide edges | Secure trim and intact sealant | Loose screw, separation, cracked sealant |
| Bottom corners | Help direct water away from the floor | Dry transitions and secure trim | Dampness, staining, swelling |
The two seals you will hear about most are the wiper seal and bulb seal. They work differently, so you need to inspect them differently too.
What Do You Need to Inspect RV Slide-Out Seals?
You do not need an expensive inspection kit. A few simple tools make small leaks much easier to find.
- Bright flashlight or headlamp
- Stable step ladder
- Microfiber cloth
- Soft cleaning brush
- Small inspection mirror
- Paper towels
- Smartphone for photos
- Pinless moisture meter, if available
- Garden hose
- Another person to watch inside during testing
Set the RV on stable ground before starting. If you need a ladder, keep it level and secure. Do not climb onto the RV roof unless your manufacturer says the roof is designed for walking.
How Do You Inspect RV Slide-Out Seals for Water Leaks?
The best inspection checks different parts of the sealing system at different slide positions. Start with the room extended, then retract it and check compression seals.
1. Start With a Clean, Dry Slide-Out
Try to inspect the slide when everything is dry. That makes fresh moisture much easier to identify later.
Remove leaves, pine needles, dirt, bugs, and other debris. Pay particular attention to the top of the slide.
A small twig trapped beneath a wiper seal can create enough space for rainwater to pass underneath it.
Wipe dirt away gently with a microfiber cloth. Avoid aggressive cleaners that could dry or damage the rubber.
You also want the surface dry because leftover wash water can make you think you found a leak when you have not.
2. Fully Extend the Slide and Check the Wiper Seals
Extend the slide completely and walk around the outside.
The long rubber strips along the sides and top are usually the wiper or sweep seals. They should contact the slide wall and wipe across it as the room moves.
Run your eyes and fingers along the seals.
Look for:
- Cracks
- Tears
- Split edges
- Missing pieces
- Rubber pulling away from its mounting surface
- Sections folded backward
- Sections stuck flat
- Uneven contact
- Hard or brittle rubber
- Dirt underneath the seal
- Areas barely touching the slide wall
A healthy wiper remains flexible and stays against the slide surface.
One small folded section can sometimes allow surprisingly large amounts of water through during wind-driven rain.
3. Check Whether the Wiper Seals Are Folding Correctly
Wiper seals can sometimes flip as the slide changes direction. That alone does not always mean something is wrong.
The important question is whether the seal reaches its intended position and maintains contact with the wall.
Compare both sides of the slide.
If one side presses firmly against the wall while the other barely touches, you may have more than a rubber problem.
That difference can indicate:
- Seal distortion
- Incorrect installation
- Slide misalignment
- Uneven room travel
Do not immediately replace the seal until you understand why the contact differs.
4. Pay Extra Attention to the Upper Corners
The upper corners deserve more attention than almost any other area.
Rainwater reaches the slide roof first. If there is a gap near the top, water can enter there and run downward inside the wall.
You may eventually find the puddle near the floor.
That often makes owners assume the bottom seal is leaking when the water actually entered several feet higher.
Inspect each upper corner slowly. Look for overlapping seal sections that no longer sit properly, open joints, cracked sealant, and rubber pulling away from the corner.
Use a flashlight if necessary. Small gaps can be difficult to see against black rubber.
5. Inspect the Top Wiper Seal
Now inspect the entire upper wiper.
Look from one corner to the other.
Make sure:
- The seal is touching the slide roof or wall correctly.
- No section has folded underneath itself.
- Debris is not holding the rubber open.
- The rubber has not torn near the corners.
- The mounting edge has not separated.
Top seals live in a difficult environment.
They face sunlight, heat, cold, rain, tree debris, and constant movement. That makes them one of the first places I would check after finding unexplained moisture around a slide.
6. Inspect the Slide-Out Roof
Do not stop after inspecting the rubber.
A leak around a slide-out does not automatically mean the slide seal is bad.
Look across the entire slide roof.
Check for:
- Small membrane tears
- Punctures
- Bubbling
- Lifted edges
- Cracked seams
- Loose corner material
- Tree sap buildup
- Leaves or twigs
- Failed sealant
- Damaged transitions where the roof meets the slide walls
If your RV has a slide topper, look underneath it as well as you reasonably can.
A topper helps keep rain and debris off the roof, but it does not make the roof waterproof by itself.
7. Check the Slide Flange, Trim, and T-Molding
Next, look around the exterior trim framing the slide.
These areas are easy to overlook because owners often focus only on the rubber.
Check for:
- Missing screws
- Loose screws
- Screws backing out
- Cracked caulk
- Sealant pulling away
- Gaps behind the molding
- Loose trim
- Open corner joints
Water can enter behind the trim and appear inside near the slide seal.
If that happens, replacing the rubber will not solve the problem.
8. Inspect the Seal Mounting Area
Gently check whether the seal is still firmly attached.
Do not pull hard enough to damage it.
You are simply checking for obvious separation.
Pay special attention to:
- Corners
- Seal ends
- Areas near fasteners
- Joints between two seal sections
A seal may look perfectly healthy from the front while the mounting edge is separating behind it.
That can create a hidden path for water.
9. Fully Retract the Slide and Check the Bulb Seals
Now retract the slide completely.
When the room closes, the bulb or compression seal should press against the slide and create a weather barrier.
Go around every accessible section.
Look at:
- Top compression
- Front side
- Rear side
- Lower areas you can safely reach
The seal should make reasonably consistent contact.
You do not want one area crushed heavily while another area barely touches.
Some manufacturers specify a particular compression amount. However, that measurement varies between slide systems.
Use your owner’s manual as the final reference for your RV.
10. Check for Uneven Bulb-Seal Compression
Compare opposite sides of the slide.
Ask yourself:
- Does the top seal contact evenly?
- Does one corner have a visible gap?
- Is one side compressed much harder?
- Does one end of the slide stop before the other?
Uneven compression can allow rain through even if the rubber is new.
It may also indicate slide alignment or travel problems.
This is an important distinction.
If the slide itself is not closing squarely, installing another seal may only hide the problem temporarily.
11. Test the Seal’s Flexibility
Gently press a small section of the bulb seal with your fingers.
Healthy rubber should feel flexible and return toward its normal shape.
Watch for rubber that is:
- Very hard
- Brittle
- Cracking when flexed
- Permanently flattened
- Crumbling
- Sticky or deteriorated
- Unable to recover its shape
A permanently crushed bulb cannot create proper sealing pressure.
That is usually a stronger replacement sign than simple surface discoloration.
12. Look for Gaps Around the Closed Slide
Stand outside and inspect the perimeter carefully.
You should not see obvious openings where the slide is supposed to seal against the RV.
If accessible, inspect inside too.
Sometimes a flashlight helps expose small gaps.
If you can see daylight around a closed slide, investigate that area closely.
The cause may be:
- Damaged seal
- Poor mounting
- Incorrect seal profile
- Slide misalignment
- Something preventing full closure
How Do You Check Inside the RV for Slide-Out Water Leaks?
Exterior inspection tells you where water might enter. Interior inspection helps you understand where it travels after getting inside.
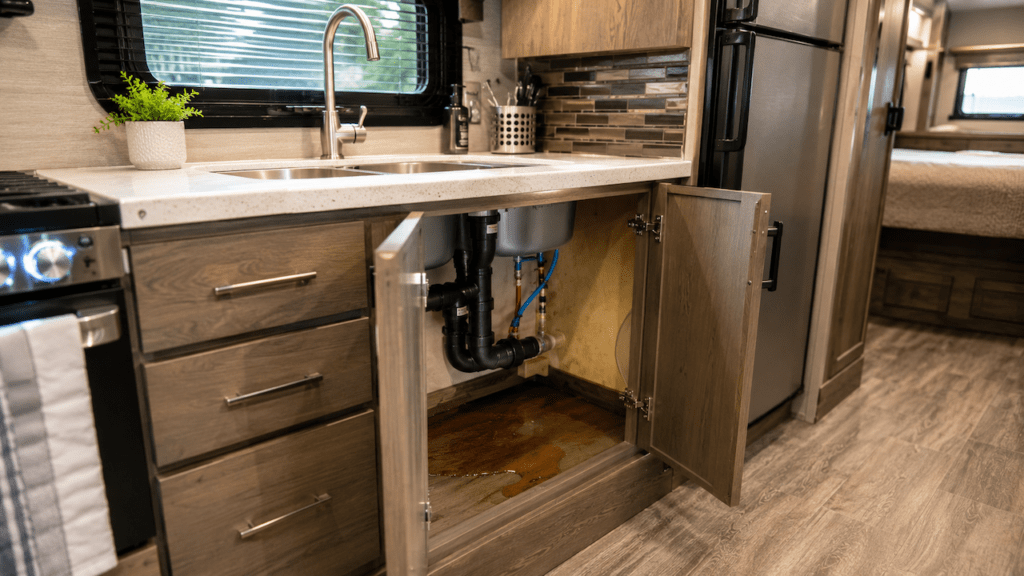
Check the Floor Around the Slide Opening
Start at the lowest point because gravity eventually brings most leaks downward.
Look and feel around the floor.
Check for:
- Damp carpet
- Wet flooring
- Swollen laminate
- Soft plywood
- Dark staining
- Peeling material
- Water near corners
Press lightly on suspicious floor areas.
A soft or spongy area may mean moisture has been present longer than you first realized.
Remember that water found at the floor does not prove the bottom seal caused the leak.
Check Walls, Trim, Cabinets, and Furniture
Water sometimes travels behind wall panels before becoming visible.
Inspect nearby areas for:
- Water streaks
- Dark stains
- Swollen trim
- Bubbling wall covering
- Rusted screws
- Damp cabinet bottoms
- Musty odors
- Mold or mildew
- Warped wood
Check behind furniture if the slide design allows it.
A small hidden stain can tell you more than the obvious puddle.
Use a Moisture Meter for Suspicious Areas
A pinless moisture meter can help you compare hidden moisture levels.
Start by testing an area you know is dry.
That gives you a baseline.
Then compare readings around:
- Slide corners
- Flooring
- Wall panels
- Window areas
- Cabinets
- Trim
Do not depend on one reading alone.
Metal framing, fasteners, surface moisture, and different materials can change meter readings.
Use the meter as another clue rather than absolute proof of the leak location.
How Can You Confirm That the Slide-Out Seal Is Leaking?
If the visual inspection does not reveal the problem, a controlled water test can help. The key is testing small areas instead of soaking everything at once.
Perform a Controlled Garden-Hose Test
Use a normal garden hose with gentle water flow.
Avoid strong spray pressure.
Follow this process:
- Choose a dry day.
- Dry the suspected area completely.
- Close the slide in the position where the leak normally occurs.
- Have one person stay inside.
- Place dry paper towels near suspected entry areas.
- Start with one small exterior section.
- Apply gentle water for several minutes.
- Watch inside for the first sign of moisture.
- Stop before moving to another section.
- Mark any area that produces water intrusion.
Patience matters here.
Water may need time to work behind trim or seals before you see it inside.
Start Low and Work Upward
When trying to isolate the exact leak, test the lowest possible area first.
Then slowly move higher.
Why?
If you soak the roof first, water will run across every lower seal.
You may then blame a lower joint when the actual entry point is higher.
Working upward gives you a better chance of isolating the source.
Never Pressure-Wash the Seal During Testing
A pressure washer creates conditions your slide seals are not normally designed to handle.
It can force water through otherwise functional seals.
It may also damage:
- Sealant
- Rubber
- Decals
- Trim
- Roof material
Use gentle water that better represents rainfall.
What Does Each Slide-Out Leak Pattern Usually Mean?
Leak location can provide useful clues. Use these symptoms as starting points rather than absolute diagnoses.
| What You Notice | Start Inspecting Here |
| Water at upper inside corner | Top seal, roof seam, corner joint |
| Wet flooring near slide wall | Upper seals first, then trace downward |
| Leak only with slide extended | Wipers, top seal, roof seams |
| Water enters after retracting wet slide | Wipers, roof debris, trapped water |
| Same corner repeatedly leaks | Compression or alignment |
| Rubber looks good but wall is wet | Flange, roof seam, trim, sealant |
| Daylight appears around closed slide | Poor compression or alignment |
| Wiper repeatedly folds inward | Wiper contact or positioning |
| Water appears beneath slide | Bottom edge or water traveling from above |
Use the pattern to narrow your search.
It is usually much easier than removing or replacing parts randomly.
Does a Slide Topper Prevent Slide-Out Seal Leaks?
A slide topper can reduce direct rain, leaves, branches, and debris collecting on the slide roof. That can certainly help the sealing system.
However, a topper does not eliminate leak risks.
You still need to inspect:
- Wiper seals
- Bulb seals
- Roof seams
- Slide corners
- Topper mounting rail
- T-molding
- Exterior sealant
Water can also blow underneath a topper during strong wind.
Treat the topper as protection rather than a replacement for proper sealing.
Should You Lubricate or Condition RV Slide-Out Seals?
This is one area where I would avoid giving every RV owner the same advice.
Different slide seals use different rubber materials and mounting systems. Some manufacturers recommend specific seal treatments, while others warn against products that attract dust and dirt.
Before applying anything, check your RV owner’s manual.
Avoid automatically spraying:
- General-purpose lubricant
- Petroleum-based products
- Unknown silicone products
- Household oils
A product that works on one seal material may shorten the life of another.
Cleaning the rubber gently and following the manufacturer’s maintenance instructions is the safest approach.
When Does an RV Slide-Out Seal Need Repair or Replacement?
Not every imperfect seal needs replacement. Sometimes cleaning or correcting the mounting issue is enough.
Clean or Reposition the Seal When
Consider simple correction when:
- Dirt is holding the wiper open.
- The rubber remains flexible.
- There are no serious tears.
- The seal occasionally folds incorrectly.
- The mounting remains secure.
- Compression looks normal after repositioning.
Clean the area and operate the slide again.
Then inspect whether the problem returns.
Repair the Mounting or Surrounding Sealant When
The rubber itself may be fine when:
- The mounting strip is loose.
- Fasteners have backed out.
- Exterior sealant has cracked.
- T-molding has separated.
- Corner joints have opened.
- Water is entering behind the flange.
Correcting the surrounding leak path may solve the issue without replacing the seal.
Replace the Seal When
Replacement becomes more reasonable when:
- Rubber is torn completely through.
- Pieces are missing.
- Cracks extend deeply into the seal.
- The bulb stays permanently crushed.
- Rubber is brittle or crumbling.
- The seal has shrunk badly.
- Proper contact cannot be restored.
- Water continues passing through damaged sections.
Before ordering a replacement, identify the exact seal profile.
RV slide seals come in many shapes, sizes, and mounting styles.
What If New RV Slide-Out Seals Still Leak?
A new seal can still leak if the actual problem was somewhere else.
If new rubber does not solve the leak, inspect the entire slide system again.
Check:
- Slide alignment
- Uneven closing
- Slide roof membrane
- Upper corners
- T-molding
- Failed exterior sealant
- Windows installed in the slide
- Topper mounting rail
- Bottom floor edge
- Water traveling from another exterior seam
Pay particular attention to alignment.
If the room closes tightly on one side but leaves less compression on the other, another seal may not solve anything.
The rubber is only one part of the slide-out’s water-management system.
How Often Should You Inspect RV Slide-Out Seals?
Follow the inspection schedule recommended by your RV manufacturer first. For most owners, regular checks during the year make sense because slide seals constantly face weather and movement.
A practical routine includes checking them:
- Before the main camping season
- Before long-term storage
- After severe storms
- After long road trips
- After parking beneath trees for extended periods
- Before retracting a dirty slide
- Whenever you notice dampness
- Whenever the slide begins closing differently
You do not need to perform a full hose test every time.
A quick visual check often catches trouble before water reaches the interior.
When Should You Have an RV Technician Inspect the Slide-Out?
Many seal inspections are easy for an RV owner. Mechanical slide problems deserve more caution, especially when alignment affects sealing.
Consider professional inspection when:
- The slide visibly sits crooked.
- One side closes before the other.
- Seal compression remains uneven.
- The leak returns after repairs.
- Flooring feels soft.
- Walls show swelling or delamination.
- Mold or significant mildew appears.
- You cannot locate the entry point.
- Structural materials appear damaged.
- The slide needs mechanical adjustment.
A heavy slide-out is not something I recommend adjusting by trial and error.
Finding the leak is one job. Correcting slide alignment safely can be a very different job.
Final Thoughts
Inspecting RV slide-out seals is easier when you follow the same order every time. Clean the room first, extend it and inspect the wipers and roof, retract it and inspect bulb compression, then look inside for moisture.
If you still cannot find the leak, perform a controlled water test one area at a time.
Most importantly, do not assume every slide leak requires a new rubber seal. The roof, trim, corners, sealant, and slide alignment all play a role. Finding the real entry point first can save you from unnecessary repairs and much more expensive water damage later.
Related FAQs
Can RV Slide-Out Seals Leak Even If They Are Not Torn?
Yes. A seal can leak because of poor compression, folded rubber, trapped debris, loose mounting, slide misalignment, or failed surrounding sealant even when there is no visible tear.
Should RV Slide-Out Wiper Seals Point Inward or Outward?
The correct position depends on the slide and seal design. Many wiper seals deflect outward when the slide is extended, but you should confirm the intended position in your RV manufacturer’s instructions.
Why Does My RV Slide Leak Only When Fully Extended?
A leak that happens only while extended often points toward the extended wiper seals, top seal, slide roof seam, or corner joints that become exposed once the room moves outward.
Why Does My RV Slide Leak at the Bottom Corner?
Water can enter through the lower corner, but it can also enter through a top seal or roof seam and travel downward behind the wall before appearing near the floor.
Can a Slide-Out Topper Stop Water Leaks?
A topper reduces direct rain and debris on the slide roof, but it cannot fix damaged seals, failed seams, poor bulb compression, loose trim, or slide alignment problems.
Can I Use a Garden Hose to Test RV Slide-Out Seals?
Yes. Use gentle water pressure and test one small area at a time while someone watches inside. Avoid pressure washers because they can force water past otherwise functional seals.
How Do I Know If My Slide-Out Bulb Seal Is Compressing Enough?
The seal should make reasonably consistent contact around the opening without obvious gaps or severely crushed sections. Exact compression specifications vary, so check your RV manufacturer’s instructions.
Should I Replace a Slide Seal If It Keeps Folding Over?
Not necessarily. Clean the seal, check its positioning, inspect for damage, and make sure the slide is aligned correctly first. Replace it when the rubber is damaged or cannot maintain proper contact.
Can Slide-Out Misalignment Cause a Water Leak?
Yes. A slide that closes unevenly may compress one section of the seal while leaving another section loose. That gap can allow rainwater to enter even when the rubber itself is in good condition.
Can Water Travel From the Top of the Slide to the Floor?
Yes. Water often follows framing, trim, or interior wall materials downward. That is why a wet floor or lower corner does not always mean the bottom seal is the original leak source.

Gregory Allen covers outdoor RV camping, essential gear, and travel preparation. His reviews are based on real conditions, not spec sheets alone. He helps RVers choose equipment that works reliably in everyday outdoor use.