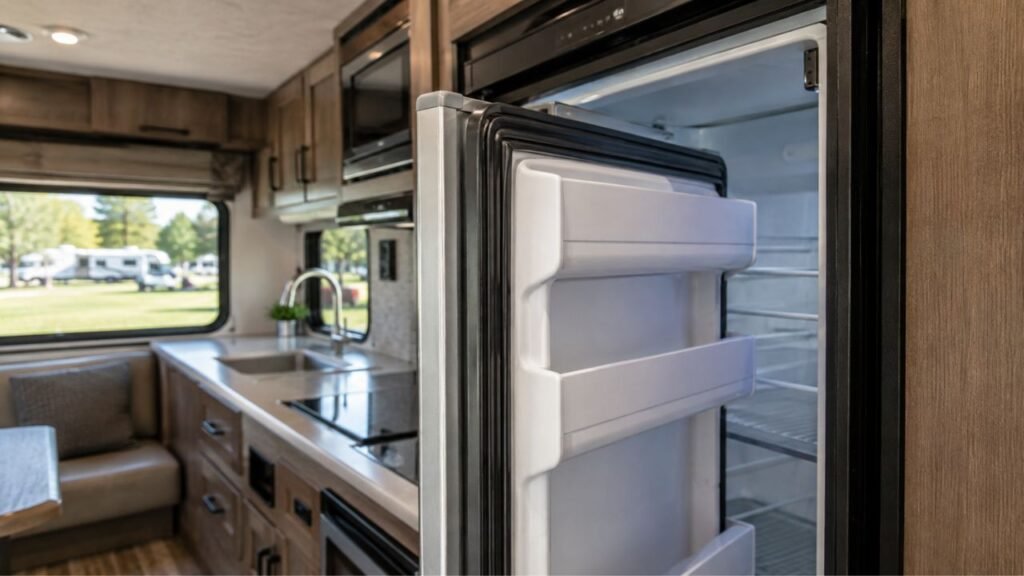
You can test an RV refrigerator door seal with a dollar bill or thin piece of paper. Close the door over the paper, then gently pull it outward. A good gasket should create noticeable resistance. If the paper slides out easily, that section of the seal may be leaking.
I’ll show you how to test the entire gasket, interpret weak spots, fix simple sealing problems, and determine whether the gasket actually needs replacement.
Key Takeaways
- Use a dollar bill or thin paper to test the door gasket.
- A good seal should create noticeable resistance when pulling.
- Test the top, bottom, sides, and corners of the door.
- Clean the gasket before deciding that it has failed.
- One weak area can indicate dirt, deformation, or door misalignment.
- Replace the gasket if it is torn, cracked, or permanently damaged.
- If the seal passes, your cooling problem may be somewhere else.
Why Does an RV Refrigerator Door Seal Matter?
Your RV refrigerator door gasket keeps cold air inside and warm, humid air outside. It may look like a simple rubber strip, but the refrigerator depends on it every time the door closes.
A leaking gasket can allow warm air into the compartment. This may lead to condensation, frost, temperature changes, and longer cooling cycles.
You might also notice food warming faster than expected.
This matters even more inside an RV because temperatures can change quickly. Road vibration can also affect doors, hinges, and gasket alignment over time.
If your refrigerator seems warmer than normal, testing the door seal is one of the easiest places to start.
What Are the Signs of a Bad RV Refrigerator Door Seal?
A weak door seal often leaves a few clues before you test it. These symptoms do not always mean the gasket is bad, but they give you a good reason to inspect it.
- Condensation around the refrigerator door
- Frost near one side or corner
- Refrigerator temperatures that keep rising
- A door that does not sit flush
- Visible gaps around the gasket
- Cracked or torn rubber
- Hard or flattened gasket sections
- A refrigerator that runs longer than usual
- A door that opens with very little resistance
Pay extra attention if the symptoms appear near one specific corner. That often helps you locate the weak area faster.
What Do You Need to Test an RV Refrigerator Door Seal?
You do not need special tools for this job. Most of what you need is probably already inside your RV.
- A dollar bill or thin piece of paper
- Soft cleaning cloth
- Warm water
- Mild dish soap
- Flashlight, optional
- Refrigerator thermometer, optional
The paper test handles most basic diagnosis.
A flashlight can help find larger gaps. A thermometer can later confirm whether refrigerator temperatures improve.
How Do You Test an RV Refrigerator Door Seal?
The dollar bill test is simple, but how you perform it matters. Testing only one section can easily miss a leak somewhere else.
Step 1: Inspect the Gasket Before Testing
Open the refrigerator and look carefully around the entire gasket.
Check for:
- Cracks
- Tears
- Flattened areas
- Hard rubber
- Folded sections
- Loose corners
- Food residue
- Dirt inside gasket folds
Run your fingers gently along the gasket.
The rubber should generally feel flexible and evenly shaped. A section that feels unusually hard or crushed deserves closer attention.
Also inspect where the gasket touches the refrigerator frame.
Sticky residue on either surface can prevent full contact.
Step 2: Clean the Gasket and Contact Surface
I recommend cleaning the seal before performing the final test.
Mix a small amount of mild dish soap with warm water. Wipe the gasket gently using a soft cloth.
Pay attention to the folds where crumbs and sticky residue collect.
Then wipe the refrigerator frame where the gasket makes contact.
Dry both surfaces afterward.
This step is important because dirt can make a perfectly usable gasket appear defective.
Retesting after cleaning may save you from replacing a good seal.
Step 3: Make Sure the Door Can Close Fully
Before blaming the gasket, make sure nothing blocks the refrigerator door.
Look for:
- Food containers sticking outward
- Oversized bottles
- Misplaced shelves
- Loaded door bins
- Items caught near the gasket
- Loose hinges
- A sagging refrigerator door
Close the door slowly and watch how it meets the cabinet.
The gap should look reasonably even around the perimeter.
If one corner sits farther away than the others, you may have an alignment problem rather than a damaged gasket.
Step 4: Perform the Dollar Bill Test
Now take a dollar bill or thin piece of paper.
Follow these steps:
- Open the refrigerator door.
- Place half the bill across the gasket.
- Leave the other half outside.
- Close the door normally.
- Pull the bill outward slowly.
- Feel how much resistance the gasket creates.
You should feel noticeable friction.
The bill does not need to become completely impossible to remove.
What you are looking for is a clear gripping effect from the compressed gasket.
If the bill almost falls out, that location needs further inspection.
Step 5: Test the Entire Door Seal
This is where many people stop too early.
One successful test does not prove the whole gasket works.
Repeat the paper test at several points around the door.
Check:
- Top edge
- Upper corners
- Left side
- Right side
- Lower corners
- Bottom edge
I like to compare strong and weak areas.
If the bill grips firmly at the top but slides freely near the bottom corner, you have already narrowed down the problem.
Remember where each weak section appears.
That makes the next troubleshooting step much easier.
Step 6: Test the Freezer Door Too
If your RV refrigerator has a separate freezer door, test that gasket as well.
Use the same process around its full perimeter.
Freezer gasket leaks can cause frost buildup and poor temperature control even when the refrigerator compartment seems normal.
What Should an RV Refrigerator Door Seal Test Feel Like?
The result is not simply “good” or “bad.” The amount and location of resistance can tell you much more about what is happening.
| Dollar Bill Test Result | What It Usually Means | What to Do Next |
| Firm resistance | Gasket is likely sealing normally | Continue testing other areas |
| Slightly weaker resistance | Possible dirt or mild deformation | Clean and retest |
| Bill slides out very easily | That section may be leaking | Inspect gasket and door alignment |
| Several areas feel loose | Gasket may be worn | Check the door before replacement |
| Gasket is torn or cracked | Physical damage is present | Find the correct replacement |
| Clean gasket still fails | Door or hinge may be misaligned | Check alignment and mounting |
Use the table as a guide rather than treating one paper test as absolute proof.
The condition of the gasket and door should always be considered together.
Can You Test an RV Refrigerator Seal With a Flashlight?
Yes, the flashlight test can help reveal obvious gaps. I consider it a useful secondary test when the paper test identifies a suspicious section.
Place a bright flashlight inside the refrigerator facing the door.
Close the refrigerator.
Darken the RV interior as much as possible.
Then look carefully around the door perimeter.
If you clearly see light escaping through a particular section, the gasket is not making complete contact there.
However, do not rely on this test alone.
A gasket can have weak compression without creating a large enough gap for visible light.
That is why I still recommend the paper test as your main diagnostic method.
What If the Dollar Bill Test Fails in Only One Spot?
A single weak area does not automatically mean you need a new gasket. Localized failures are often easier to fix.
The Gasket May Be Dirty
Food residue can hold the gasket slightly away from the refrigerator frame.
Even a small sticky spot can affect the paper test.
Clean the gasket and frame thoroughly.
Then repeat the test in the same location.
If resistance improves, replacement may not be necessary.
The Gasket May Be Folded or Deformed
Inspect the weak section from several angles.
Sometimes the gasket becomes folded inward or sits differently from the surrounding rubber.
Avoid aggressively heating or stretching it without checking your refrigerator instructions.
Different RV refrigerator models use different gasket materials and mounting methods.
The Gasket May Not Be Fully Seated
Some gaskets fit into a channel or retaining groove.
If part of the gasket has pulled loose, that area may not reach the refrigerator frame properly.
Compare the weak area with sections that seal correctly.
If the gasket appears loose, check the refrigerator manual before removing or reinstalling it.
Do not assume every Dometic, Norcold, Furrion, or residential-style RV refrigerator uses the same attachment system.
The Refrigerator Door May Be Misaligned
The gasket itself may be fine.
Instead, the door may have shifted slightly.
RV travel exposes the refrigerator to repeated vibration. Over time, hinges or mounting hardware can loosen.
A loaded refrigerator door can also place extra stress on its hinges.
Look at the closed door from the front.
If one side appears lower, or one corner sits farther from the frame, check the door alignment before replacing the gasket.
Can You Fix an RV Refrigerator Door Seal Without Replacing It?
Sometimes you can. I recommend trying the simple causes first before spending money on a new gasket.
- Clean the gasket thoroughly.
- Clean the cabinet contact surface.
- Remove anything blocking the door.
- Check for loose hinge hardware.
- Check whether the gasket is seated correctly.
- Reduce excessive weight stored in door bins.
- Retest every weak section afterward.
I would avoid random gasket hacks unless your refrigerator manufacturer approves them.
Petroleum products, strong adhesives, aggressive heat, and generic weatherstripping can create additional problems.
RV refrigerator door seals are designed for specific doors.
Fix the cause instead of covering the problem temporarily.
When Should You Replace an RV Refrigerator Door Seal?
Replacement makes sense when cleaning and alignment checks cannot restore a reliable seal.
Consider replacement when:
- The gasket is torn.
- Rubber is badly cracked.
- Sections have become permanently hard.
- The gasket stays flattened.
- The seal has separated from its mounting area.
- Multiple locations fail after cleaning.
- Door alignment is correct but gaps remain.
Before ordering anything, identify your refrigerator model.
This is especially important with older RV refrigerators.
Some models allow straightforward gasket replacement. Others may use door designs where the manufacturer recommends replacing a larger component.
Do not buy a gasket based only on refrigerator size.
The shape, thickness, mounting method, and part number must match.
How Do You Find the Correct Replacement Seal?
Finding the correct gasket starts with identifying your refrigerator. Guessing based on appearance can easily lead to the wrong part.
Check for:
- Refrigerator manufacturer
- Exact model number
- Serial number
- Refrigerator or freezer door location
- Correct gasket part number
Common RV refrigerator brands include Dometic, Norcold, and Furrion.
Your model label may be inside the refrigerator compartment, near the door frame, or in another location specified by the manufacturer.
Use the exact model information before ordering.
A gasket that is slightly too thick or thin can create another sealing problem.
How Do You Know the Seal Is Fixed?
Do not assume the repair worked simply because the door looks better. Retesting confirms whether the gasket now makes proper contact.
Repeat the Dollar Bill Test
Return to every location that previously felt weak.
Perform the same paper test again.
You should notice improved resistance.
Then test several other sections for comparison.
A consistent grip around the perimeter is what you want.
Watch for Condensation and Frost
Keep an eye on the refrigerator during normal use.
Condensation around the door should decrease if the leaking gasket caused it.
Localized frost should also become less noticeable.
If moisture continues appearing in exactly the same area, inspect that section again.
Check the Refrigerator Temperature
Use a refrigerator thermometer if you are concerned about cooling performance.
For food safety, your refrigerator should generally keep food at 40°F or below.
Do not rely entirely on how cold a bottle or shelf feels.
A thermometer gives you a much clearer picture.
If temperatures remain too high even though the gasket passes the test, look for another refrigerator problem.
What If the Door Seal Passes but the RV Refrigerator Is Still Warm?
A good gasket only rules out one possible cause. If the seal tests well, move on rather than replacing it anyway.
Other possible causes include:
- Poor exterior refrigerator ventilation
- Blocked airflow inside the refrigerator
- Refrigerator overloaded with warm food
- Incorrect temperature setting
- Thermistor problem
- Propane supply problem
- AC electrical problem
- DC electrical problem
- RV parked too far off-level with some absorption refrigerators
- Refrigerator not given enough cooling time
- Cooling system failure
Older absorption refrigerators deserve particular attention to leveling and ventilation.
A compressor-style RV refrigerator operates differently, so troubleshooting steps can vary.
There is one situation where I would stop normal troubleshooting immediately.
If an absorption refrigerator produces a strong ammonia smell or you notice unusual yellow residue around the cooling unit, shut the refrigerator down and have it inspected.
Do not keep operating it while trying gasket fixes.
How Can You Keep an RV Refrigerator Door Seal Working Longer?
A little routine care can prevent many gasket problems. RV refrigerator seals usually last longer when they stay clean and properly aligned.
- Wipe spills from the gasket quickly.
- Clean food from gasket folds.
- Check corners for deformation.
- Avoid slamming the refrigerator door.
- Do not overload door storage.
- Inspect hinges after long trips.
- Keep the refrigerator frame clean.
- Test the gasket when cooling symptoms appear.
- Inspect the freezer gasket at the same time.
You do not need to obsessively test the seal every few weeks.
A quick inspection during normal RV maintenance is usually enough unless symptoms appear.
Final Words
Testing an RV refrigerator door seal is one of the easiest refrigerator checks you can perform yourself. Start by inspecting and cleaning the gasket, then use the dollar bill test around the entire door.
If you find a weak area, do not immediately order a replacement. Check for dirt, door alignment, gasket seating, and obstructions first. Once you fix the suspected problem, retest the exact same locations.
If the gasket passes but your refrigerator still struggles to stay cold, you have useful information. The door seal probably is not the main problem, and you can move on to cooling, ventilation, power, or propane troubleshooting.
Related FAQs
Can I Use Paper Instead of a Dollar Bill to Test an RV Refrigerator Seal?
Yes. A thin piece of regular paper can work if you do not have a dollar bill. Close the paper across the gasket and pull gently. You are looking for noticeable resistance rather than testing the strength of the paper.
How Much Resistance Should a Refrigerator Door Seal Have?
You should feel a clear gripping resistance when pulling the paper outward. The bill does not need to be completely stuck, but it should not slide out freely with almost no friction.
Should a Dollar Bill Be Impossible to Pull Out of a Refrigerator Door?
No. A properly sealing refrigerator gasket can still allow the bill to be pulled out. The important sign is noticeable, consistent resistance around the door rather than making the bill impossible to remove.
Should I Test the Freezer Door Seal Too?
Yes. Test a separate freezer gasket using the same method. A leaking freezer door seal can allow warm air inside and contribute to frost buildup, temperature changes, and longer cooling cycles.
Why Does My RV Refrigerator Door Seal Leak Only at One Corner?
A single leaking corner may come from dirt, gasket deformation, poor gasket seating, or a slightly misaligned refrigerator door. Clean the area first, inspect the door position, and perform the paper test again.
Can a Bad RV Refrigerator Door Seal Cause Frost?
Yes. Warm, humid air entering through a weak gasket can introduce moisture into the refrigerator or freezer. That moisture can freeze and create frost, especially near the section where the seal leaks.
Can a Bad Door Seal Make an RV Refrigerator Not Get Cold?
A bad door seal can contribute to poor cooling because cold air escapes while warmer air enters. However, poor cooling can also come from ventilation, power, propane, airflow, or cooling-system problems.
How Often Should I Check My RV Refrigerator Door Seal?
Check the gasket during routine refrigerator maintenance and whenever you notice condensation, frost, unusual temperatures, or a door that seems loose. It is also worth inspecting after extended RV travel.
Can RV Travel Cause Refrigerator Door Seal Problems?
Yes. Road vibration can gradually loosen hinges, affect door alignment, or cause a gasket to shift. Heavy items stored in refrigerator door bins can also increase stress on the hinges during travel.
Do I Have to Replace the Entire Door if the Refrigerator Gasket Is Bad?
Not always. Some RV refrigerators have replaceable gaskets, while other models use different door constructions. Check your exact refrigerator model and manufacturer instructions before ordering a gasket or replacing the door.

Gregory Allen covers outdoor RV camping, essential gear, and travel preparation. His reviews are based on real conditions, not spec sheets alone. He helps RVers choose equipment that works reliably in everyday outdoor use.